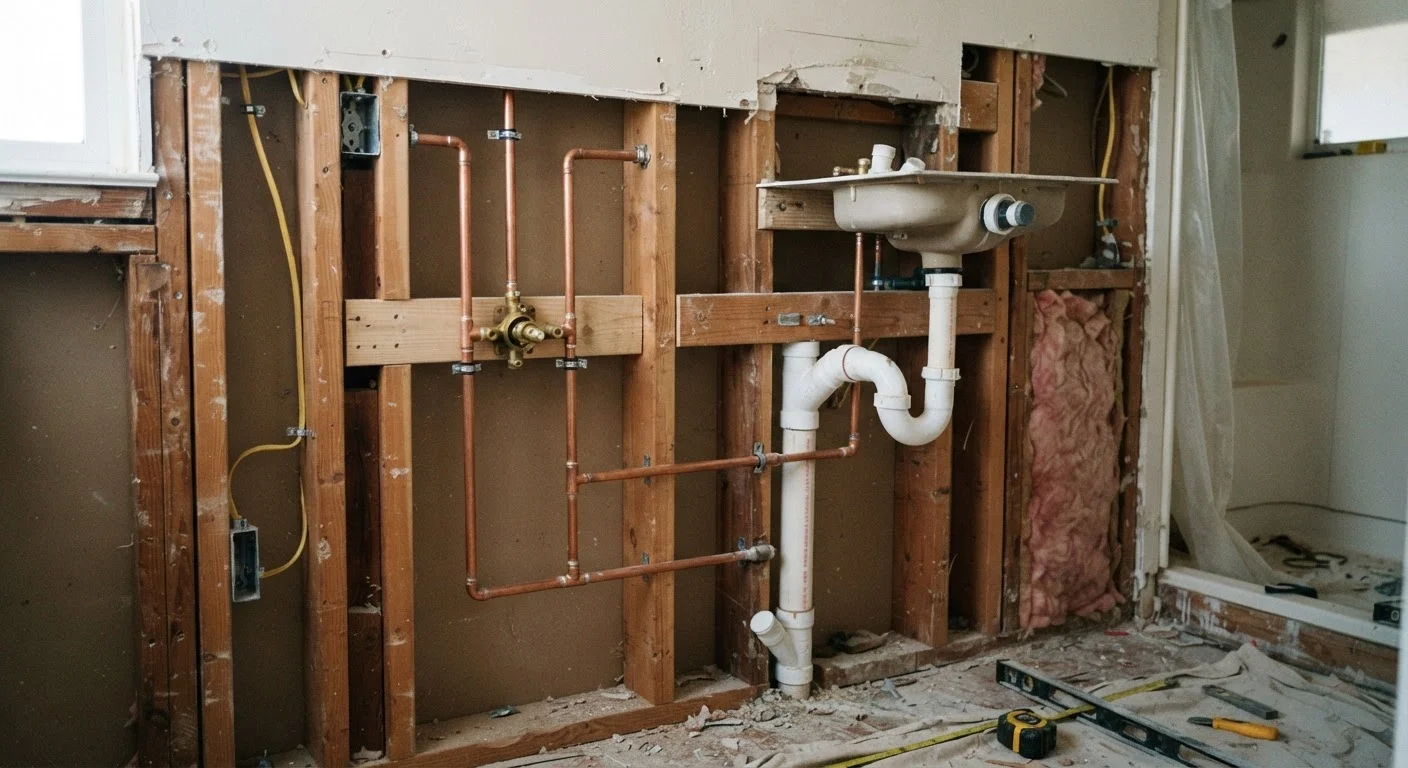
What Rough-In Plumbing Actually Involves
Rough-in plumbing is the foundation of any plumbing system - the work that happens inside walls, floors, and ceilings before a single tile is laid or a single cabinet is hung. During this phase, a licensed plumber installs the three interconnected systems that make your fixtures function: supply lines (which deliver hot and cold water), drain-waste lines (which carry water and waste away), and vent stacks (which regulate air pressure so drains flow properly).
For a bathroom renovation, rough-in work might involve cutting into subfloor to reposition a toilet drain, running new copper or PEX supply lines to a relocated vanity, or adding a new vent stack to meet code. In a kitchen renovation, it often means extending supply lines to an island or repositioning drain connections for a new sink layout.
This is also the phase where most critical decisions must be finalized. Moving a drain even a few feet can require breaking concrete slab, rerouting multiple pipe runs, and significantly increasing labor cost. If you're planning a renovation, lock in your fixture locations before rough-in begins - changes afterward are expensive. See our guide to planning a kitchen renovation for how to approach layout decisions before contractors start work.
Rough-In Dimensions Matter for Fixture Compatibility
Every fixture has standard rough-in dimensions - the toilet rough-in distance, for example, is typically 12 inches from the finished wall to the center of the drain. If a replacement toilet has a different rough-in measurement than what's already installed, an offset flange or new rough-in work may be needed. Always verify fixture rough-in specs before purchasing.
The Inspection Gap: Why Walls Stay Open
One of the most important - and frequently misunderstood - moments in a renovation is the stretch between rough-in completion and wall closure. Before drywall goes up, a municipal building inspector must typically sign off on the rough-in work. This inspection verifies that pipe diameters meet code, drain lines slope correctly (generally ¼ inch per foot for horizontal runs), venting is properly sized, and all connections are secure.
Failing to schedule this inspection, or closing walls before it occurs, can trigger stop-work orders and require opening walls for a retroactive review. If you're working with a general contractor, confirm in writing that they are responsible for scheduling all required inspections. Our article on renovation contract terms explains how to document this kind of responsibility clearly before work begins.
~$1,500-$4,000
Typical rough-in cost for a single bathroom
According to industry estimates from HomeAdvisor and similar sources, rough-in plumbing for a standard bathroom renovation typically falls in this range, excluding fixture costs and any slab work.
¼ inch per foot
Minimum drain slope required by most plumbing codes
The International Plumbing Code, which most U.S. jurisdictions adopt in some form, specifies this minimum slope for horizontal drain lines to ensure adequate drainage.
Finish Plumbing: What Trim-Out Actually Means
Once walls are closed, flooring is laid, and surfaces are finished, the plumber returns for trim-out - the finish plumbing phase. This is when fixtures are physically connected and made operational: toilets are set and bolted down, faucets are mounted and supply lines are connected to shutoff valves, showerheads and tub spouts are installed, and p-traps beneath sinks are connected to drain stubs.
Finish plumbing is more precise and detail-oriented than rough-in. A gap in caulking around a toilet base, a loose supply line fitting, or an improperly seated wax ring can cause water damage that's invisible until it's serious. Confirm that your plumber tests every connection before the job is considered complete.
It's worth noting that finish plumbing is often where homeowner-supplied fixtures - faucets, toilets, or showerheads purchased separately - are installed. Coordinate with your plumber ahead of time so they can verify that your chosen fixtures are compatible with the rough-in dimensions already set. This is particularly relevant if you're weighing a full renovation against a more cosmetic update; our article on bathroom remodel vs. refresh can help clarify which approach fits your situation.
Ask Your Plumber for a Punch-Out Walkthrough
Before signing off on finish plumbing, ask your plumber to walk through every installed fixture with you and demonstrate that each connection is water-tight and draining correctly. Running water through each fixture and checking under sinks and behind toilets for any seepage takes only a few minutes and can catch issues before walls are concealed or floors are sealed.
After the Work Is Done: Inspections and Long-Term Considerations
Many jurisdictions require a final plumbing inspection after finish work is complete. This review checks that all fixtures are properly installed, that no connections are leaking, and that the completed system matches what was permitted. If a follow-up home inspection occurs - for instance, when selling the home after a major renovation - plumbing work will be among the items reviewed. Learn more about what inspectors look for after a major renovation to understand how completed plumbing work is evaluated.
Maintaining documentation of your permits, inspection sign-offs, and contractor invoices protects you as a homeowner. These records demonstrate that work was done to code and can be invaluable during a future home sale or an insurance claim involving water damage.
This article is for general informational purposes only and does not constitute legal, financial, or professional contracting advice. Plumbing requirements vary by jurisdiction - always consult your local building department and a licensed plumber before beginning any renovation work.