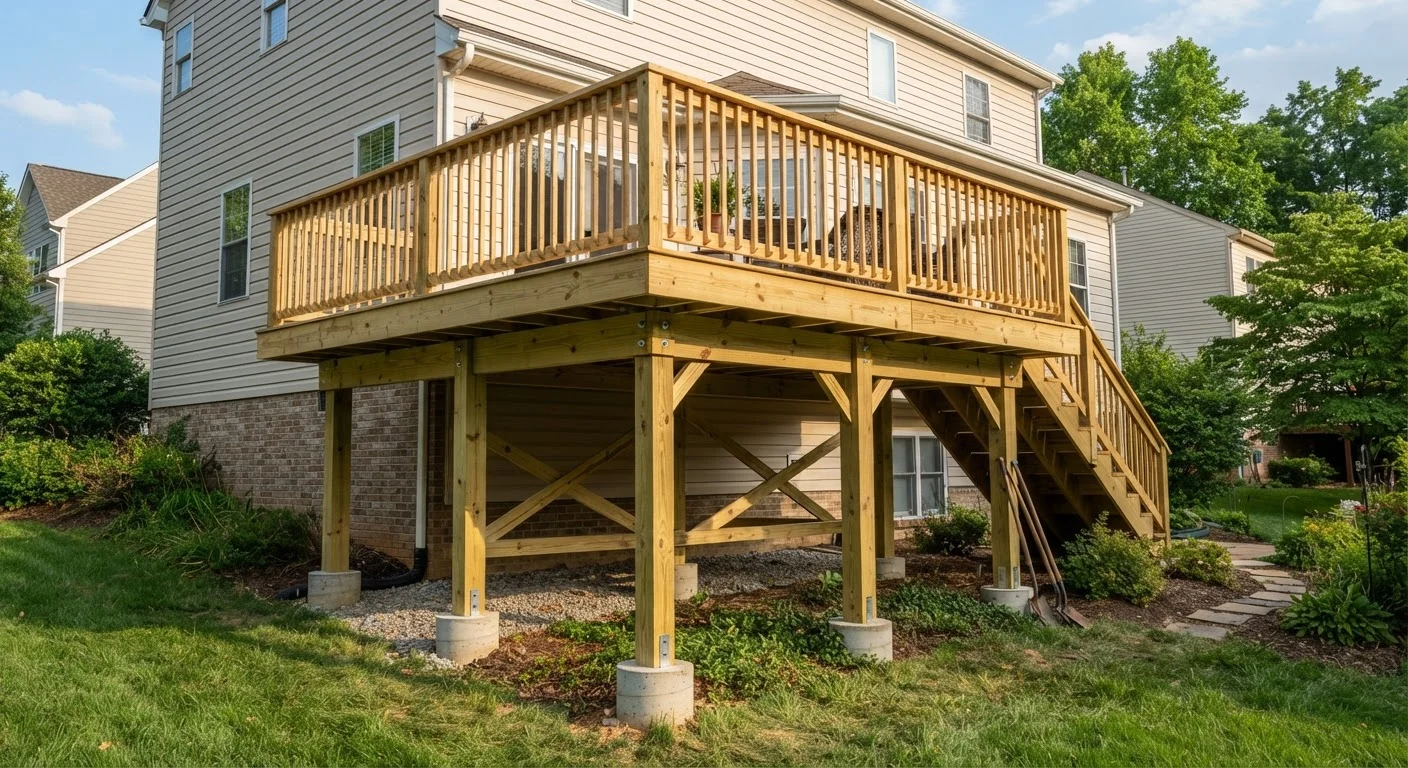
Planning Your Deck: Size, Layout, and Setbacks
A successful deck project begins well before any lumber is purchased. The planning phase determines whether your vision is buildable, legal, and structurally sound on your specific lot.
Start by sketching your intended footprint and measuring it against your property survey. Local zoning ordinances establish setback requirements - the minimum distance a structure must sit from your property lines, easements, and sometimes neighboring structures. These rules differ by municipality and zoning district. Home addition planning resources can help you understand how lot coverage and setback rules interact. You can also review the broader context of how land use rules work in our guide to understanding zoning laws.
Consider traffic flow, sun exposure, and how the deck will connect to the home's interior. A deck placed off the kitchen reads very differently from one accessed through a bedroom. Sketch multiple configurations before committing to a layout.
Choosing the Right Materials
The decking surface is the most visible element of your project, but structural members - posts, beams, joists - must also be chosen carefully. Here are the main options:
Frost line
The maximum depth at which soil freezes in winter. Footings must be placed below this depth to prevent them from shifting as the ground freezes and thaws.
Ledger board
A horizontal framing member bolted directly to the house that supports one end of the deck's joist system. Proper attachment and waterproofing are critical to structural safety.
Pressure-treated lumber
Wood that has been infused with chemical preservatives under pressure to resist rot, decay, and insect damage. It is the standard material for deck framing and posts.
Setback
The minimum required distance between a structure and a property line, easement, or other boundary, as specified by local zoning rules.
Tributary area
The portion of a deck's surface area whose load is carried by a single structural element, such as a post or footing. Larger tributary areas require larger footings.
Composite decking
A manufactured decking material made from wood fiber and recycled plastic. It resists moisture and decay and requires less maintenance than natural wood.
- Pressure-treated (PT) lumber: The most common and affordable structural choice. Modern PT wood uses alkaline copper quaternary (ACQ) preservatives, which resist rot and insects. It requires periodic sealing and is prone to warping if not properly dried before installation.
- Composite decking: Made from a blend of wood fiber and recycled plastic. Highly resistant to moisture, rot, and fading. Upfront cost is higher, but long-term maintenance is significantly lower.
- Hardwoods (e.g., ipe, tigerwood): Naturally dense and durable, with attractive grain. They can last decades with proper care but are harder to work with, expensive, and must be sourced responsibly.
- Cedar and redwood: Naturally rot-resistant, lighter than hardwoods, and easier to cut. They require regular sealing but are popular for their appearance and workability.
Structural framing - posts, beams, and joists - is almost always pressure-treated lumber regardless of what decking surface you choose. Hardware should be rated for the preservative used in your PT lumber to prevent corrosion.
Match Your Hardware to Your Lumber
Modern pressure-treated lumber is more corrosive to standard galvanized hardware than older formulations. Use fasteners, joist hangers, and post bases rated for the specific preservative in your PT lumber - typically labeled ACQ-compatible or hot-dipped galvanized. Using the wrong hardware can lead to premature corrosion and structural weakening.
Footings: The Foundation of Deck Safety
Footings are the concrete anchor points that transfer your deck's load into stable soil below the frost line. Getting them right is non-negotiable - an undersized or shallow footing can shift, heave, or fail, causing the entire deck to become unsafe.
Frost line depth is the critical variable. Footings must be poured below this depth so that soil movement from freezing and thawing doesn't push the footing - and everything above it - out of position. Frost depths range from near zero in South Florida to 48 inches or more in Minnesota and northern New England. Your local building department publishes the required depth for your area.
Footing diameter is determined by the load the post will carry, which depends on the deck's tributary area and the weight it will support. Most residential decks use tube-form concrete footings ranging from 10 to 18 inches in diameter. A structural engineer or your building inspector can confirm sizing requirements.
Never Skip the Footing Inspection
Most building departments require an inspection of your footing holes before you pour concrete. Skipping this step - or pouring too early - can result in a failed inspection that requires breaking out the concrete and starting over. Schedule the inspection and wait for approval before pouring.
Post bases set in concrete (rather than buried posts) are now the preferred method in most codes because they keep wood above grade and reduce rot risk. Consult your local code for accepted footing-to-post connection details.
Permits, Inspections, and Code Compliance
In the vast majority of U.S. jurisdictions, a deck attached to the house requires a building permit. Many areas also require permits for freestanding decks above a specified height - often 30 inches. Skipping this step carries real consequences: unpermitted structures can complicate refinancing, delay home sales, and may need to be demolished at your expense.
Our companion article on what a home improvement permit covers explains the full permit and inspection process in detail. For a deck specifically, inspectors typically review footing depth and size before concrete is poured, framing and ledger connections after rough framing, and the completed structure including railings and stairs.
Building codes for decks in most areas follow the IRC or a state-adopted variant. Key requirements typically include: minimum railing height (usually 36 inches for decks under 30 inches, 42 inches above), maximum baluster spacing (no more than 4 inches), and stair rise/run dimensions. Always verify with your local authority having jurisdiction (AHJ), since local amendments are common.
Local Codes Override National Standards
While the International Residential Code (IRC) sets a widely adopted baseline, many states and municipalities adopt amendments or use entirely different code editions. What applies in one county may not apply in the next. Always confirm requirements directly with your local building department rather than relying solely on national guides or online tutorials.
Framing, Ledger Boards, and Structural Basics
Once footings are set, the structural skeleton comes together: posts sit on footings, beams span between posts, joists run perpendicular to the beams, and decking boards are fastened on top.
For attached decks, the ledger board - the framing member bolted directly to the house - deserves particular attention. Ledger failures are among the most common causes of serious deck collapses. The ledger must be bolted (not nailed) to the house rim joist with properly spaced lag screws or through-bolts, and flashing must be installed to direct water away from the connection. Any house sheathing or siding behind the ledger must be handled correctly to maintain the weather barrier.
Joist sizing and spacing depend on the span - how far each joist must travel between supports. Span tables, published in the IRC and by industry groups like the American Wood Council, specify the correct lumber dimension for a given span and spacing. Using undersized joists leads to bounce and long-term structural fatigue.
Diagonal bracing may be required for taller decks to resist lateral movement. Your permit drawings or engineer's specifications will clarify when this applies.
When to DIY and When to Hire a Pro
A simple ground-level deck is within reach for a homeowner with solid carpentry fundamentals, the right tools, and the patience to pull permits and study the applicable code. More complex situations call for professional help - or at least professional input.
Consider hiring a licensed contractor or structural engineer when your deck is elevated more than one story, when the ledger attaches to a complex or unfamiliar house framing system, when the project involves electrical work for lighting or outlets, or when soil conditions are unusual (steep slopes, expansive soils, high water tables). Our guide to deciding what to DIY vs. hire out offers a practical framework for making this call honestly.
Even if you do most of the work yourself, having a structural engineer review your footing and framing plan is a low-cost safeguard that can prevent expensive corrections later. And remember: the permit inspection process, while occasionally inconvenient, is one of the best quality-control mechanisms available to a homeowner.
This article is for general informational and educational purposes only. Building codes, permit requirements, and structural standards vary by location. Always consult your local building department and, where appropriate, a licensed contractor or structural engineer before beginning any construction project.